Winterizing your above ground pool the right way protects your equipment from freeze damage, keeps your water clean through the off-season, and makes spring opening faster and cheaper.
We’ll walk you through every step below, from balancing the water a week out to securing the winter cover.
When to Winterize Your Pool
Start the closing process when daytime water temperatures stay consistently at or below 65°F. Closing earlier traps warm water under the cover, which burns through sanitizer and invites algae. In Oklahoma, Western Arkansas, and North Texas, that window typically falls between late October and mid-November, depending on the year.
Plan on two to three days from start to finish, so chemicals have time to circulate before you cover the pool.
What You’ll Need
Before you start, gather these supplies so you aren’t running back to the showroom mid-project:
- Winter pool cover sized for your pool with a cable and winch
- Air pillow (one for round pools, two or more for oval)
- Skimmer compensator (also called a Gizzmo or skimmer plug) and return plug
- Winter pool closing chemical kit (shock, algaecide, stain and scale)
- Pool brush and vacuum
- Submersible pump or short garden hose for lowering water if needed
- A bucket or basket for storing drain plugs over the winter
If you’re unsure which cover size or chemical kit fits your pool, bring measurements or a water sample into any Galaxy location for a free consultation.
Step 1: Balance Your Water Chemistry
Test and balance your pool about a week before closing. Aim for these ranges:
- pH: 7.4 to 7.6
- Total alkalinity: 80 to 120 ppm
- Calcium hardness: 175 to 225 ppm for vinyl liners
- Chlorine: 1 to 3 ppm after shock dissipates
Balanced water through the off-season prevents scale, staining, and corrosion on your metal components. If you’d rather skip the guesswork, bring a water sample to any of our five locations for a free water test. Our chemical specialists will write a custom closing plan for you.
Step 2: Clean the Pool Thoroughly
A pool that goes into winter dirty comes out of winter worse. Brush the walls and floor, vacuum every corner, and skim out leaves and debris. Any organic material left behind will eat through your winterizing chemicals and stain the liner.
Remove the ladder and return the jet fittings, solar blankets, pool toys, and any other accessories. Rinse them, let them dry, and store them indoors where they won’t rust or freeze.
Step 3: Add Winter Chemicals
With the pump still running, add your winter chemicals in this order:
- Stain and scale remover
- Algaecide
- Shock
Let the pump circulate for at least an hour after the last addition so everything distributes evenly. Some pool owners prefer non-chlorine shock for winter closings since it won’t degrade the cover or react with algaecide.
Step 4: Winterize Your Filter and Pump
Set your filter head to the “winterize” position. This opens the internal valve and lets the pool water above the return line drain off so it can’t freeze inside the equipment.
If your pump is hard-plumbed and won’t come off easily, you can winterize it in place. Locate the three drain plugs and remove them:
- One on the side of the pump housing
- One on the front of the pump housing
- One on the bottom of the filter tank
Drop all three plugs into the pump basket so they don’t disappear over the winter. With every plug out, water drains freely, and nothing freezes solid.
If your equipment isn’t hard-plumbed, disconnect all three hoses and bring them inside along with the pump and filter. Pull the large drain plug at the base of the filter tank before storing.
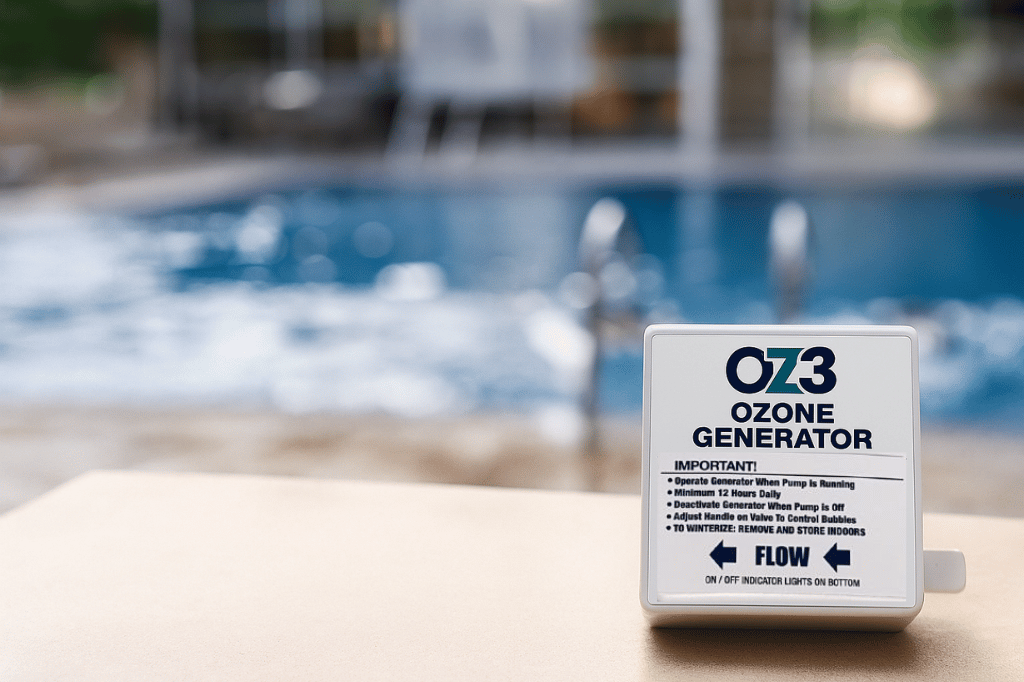
Step 5: Winterize a Clear Blue or Nature’s Pure Ionizer
If you have a Clear Blue or Nature’s Pure ionizer, two parts come inside for the winter. The control pad unmounts from its bracket and stores indoors. The diodes unscrew from the clear pipe section and come inside with the control pad.
The clear pipe housing itself is glued into your plumbing and stays outside. As long as the rest of your equipment is properly drained, the housing will be fine through the freeze.
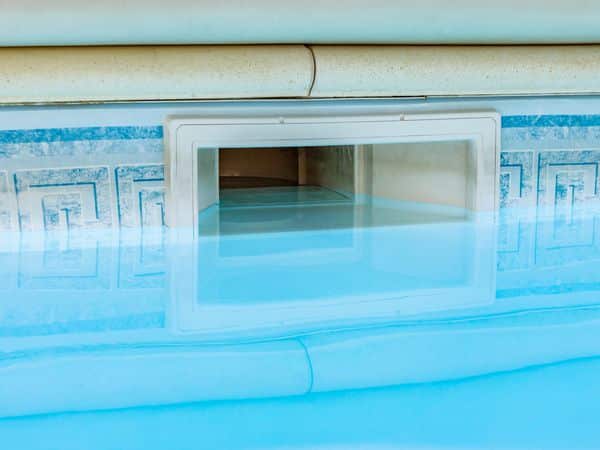
Step 6: Install the Skimmer Compensator and Return Plug
This is the step that most often gets skipped, and it’s the one that protects your skimmer and return lines from cracking when the water freezes.
Installing the skimmer compensator:
The compensator is a bottle with a universal plug on the end that seals the skimmer opening from the pool side. Water inside the bottle freezes and expands into the bottle itself rather than pushing outward against the skimmer walls.
Pull the skimmer basket out, fit the compensator into the hole at the bottom of the skimmer, press down, and wiggle until it seats. You should feel it lock in place. Now the water can stay at its normal level, which takes pressure off your cover and helps your pool walls hold their shape under snow load.
Installing the return plug:
Pull the eyeball assembly out of your return jet. It comes apart in three pieces: the locking ring, the directional eyeball, and the back fitting. The back fitting has two small notches inside. Use needle-nose pliers to grip the notches, then twist counterclockwise to free it.
Slide the return plug into the empty return opening and tighten the wing nut. That seals the return so water can’t drain out and freezing water can’t crack the line.
Because the compensator and return plug let you leave the water at its normal level, you don’t have to drain the pool. The water actually helps your cover last longer by keeping it supported from underneath, and it relieves stress on the top rails.
Step 7: Add the Air Pillow
Inflate your air pillow to about 50 percent (not all the way) and float it in the center of the pool. The pillow does two important jobs through the winter. It absorbs the outward pressure of expanding ice so the force doesn’t reach your pool walls. And it creates a slight tent under the cover so rain, snow, and debris slide toward the edges instead of pooling in the middle.
For round pools, one pillow centered does the job. For oval pools, use two or more spaced down the length.
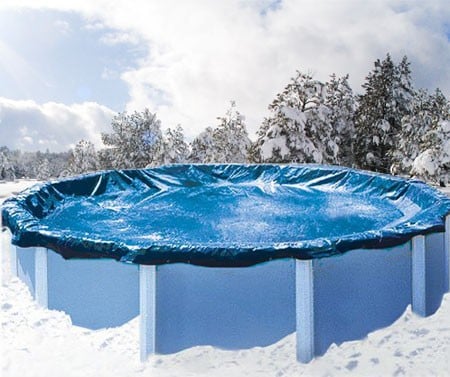
Step 8: Install the Winter Cover
Pull the cover out of the box and lay it flat next to the pool. Thread the cable through the grommets or loops along the perimeter before you spread it over the water; threading is much easier on dry ground.
With at least one helper, lift the cover and lay it across the pool. Winter covers are oversized on purpose. A 28-foot round pool uses a 32-foot round cover, which gives you two feet of overlap on every side. The cover will dip slightly into the pool as it settles, which is normal.
Once the cover is centered and even, feed the cable into the winch and tighten until the cover sits snug against the pool wall. Turn the winch buckle to lock it. Tuck any loose overhang under or against the pool wall so wind can’t lift the cover during storms.
5 Common Winterizing Mistakes to Avoid
A few errors come up year after year. Watch for these:
- Closing too early. Warm water plus winter chemicals equals a green pool by March. Wait for consistent 65°F water.
- Skipping the water balance. Unbalanced water corrodes equipment and stains the liner even under a cover.
- Forgetting the drain plugs. Trapped water expands when it freezes and cracks whatever it’s sitting in. Pull every plug.
- Draining the pool too low. Lowering the water more than a few inches below the skimmer puts the vinyl liner at risk and lets the walls flex in wind.
- Loose cover. A loose cover collects debris, sags, and tears. Tighten the winch and re-check it after the first big storm.
Frequently Asked Questions About Pool Winterization
Do I have to drain my above ground pool to winterize it?
No. With a skimmer compensator and return plug installed, you can leave the water at its normal level. The water actually supports the cover and reduces stress on the pool walls.
How long does it take to winterize an above ground pool?
Plan on two to three days from start to finish. The actual hands-on work takes a few hours, but you need time between balancing the water, adding chemicals, and installing the cover.
Do I need an air pillow under my winter cover?
Yes. The air pillow absorbs the pressure of expanding ice and keeps debris from settling in the center of the cover. Skipping it is one of the most common causes of winter pool damage.
What happens if I don’t winterize my above ground pool?
Trapped water in your skimmer, return lines, pump, or filter will freeze, expand, and crack the equipment. You’ll also walk into a green, algae-filled pool in spring that costs far more in chemicals and labor to recover.
Can I leave the ionizer outside in winter?
The clear pipe section of a Clear Blue or Nature’s Pure ionizer can stay outside since it’s glued into the plumbing. The control pad and diodes need to come indoors.
Need a Hand With Winterization?
Winterizing isn’t complicated once you’ve done it once, but if you’d rather have a pro handle it, Galaxy’s service team closes pools across Oklahoma, Western Arkansas, and North Texas every fall. Schedule a service call or bring a water sample to your nearest location for a free water test and custom closing plan.
Schedule your pool closing service today.
In need of more assistance? Bring a water sample to any one of our 5 locations for a free water test. Our chemical specialists will be happy to help you achieve crystal clear water. Shop our Swimming Pool Chemicals Here